Sunday, October 30, 2011

An experiment, a mistake, and some goodies

I know that Annee has a ton of stuff to post, and I have a feeling it will all blow what I'm about to post out of the water, but for the sake of just getting things going on MoM, I'm sharing what's come out of Made on Maple West Coast.  Not too much, but I think I'm slowly finding my stride with 3 little ones, a husband, house work, and my inner desire to create.


Hopefully that means you'll see more from me soon.  No promises, but I'm crossing my fingers and holding my breath!


Okay, like a month ago, or maybe even longer I had the idea for a cute and simple bag to make.  


I wanted it to have grommets, a braided handle, and stripes.  I'm not sure why all those things got thrown together, but they did, and I made this little number.


I'm still on the fence about it.  It's cute, but I'm not sure it's something I'll repeat.  We'll see.


Around the same time I dreamt up the bag idea, I wanted to make another one of these jumpers that Annee first made for her girls.  When I went to cut my pattern, I realized I had the wrong size pattern.  Luckily I found the right size pattern at JoAnn's for $1.99.  However, I sewed up the jumper last night, and as soon as it was all done, I just knew it was way too big.  Actually I knew before it was all done, but it was only after I completed it that I accepted that it was probably not going to be wearable.


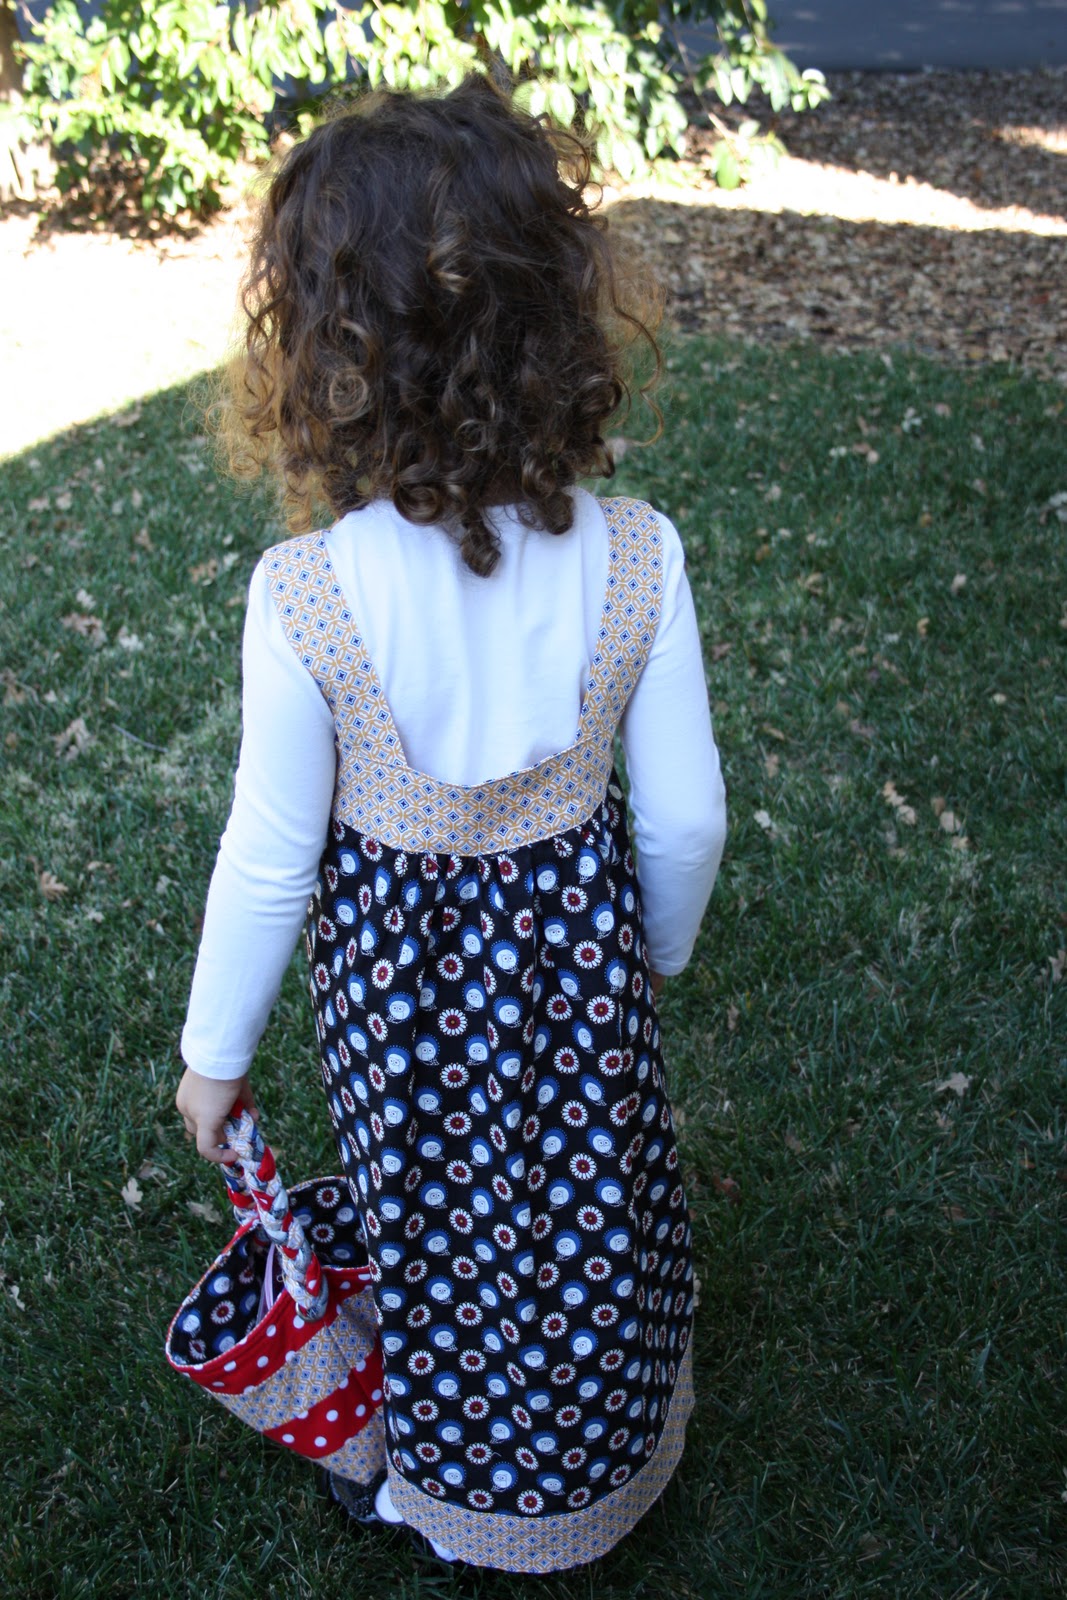
But, I made Grace wear it to church today anyway.  Why not!?  I sacrificed some sleep for it, so I might as well see my hard work put to use.  She didn't seem to mind, and she was thrilled that it had pockets.  Oh well.


On Friday night I set up an assembly line to create some Trick-or-Treating bags for tomorrow night.  


I knew I wasn't going to be able to sew Halloween costumes this year (and I really didn't want to anyway), but when I saw these cute bags on Homemade by Jill, I knew I wanted to make some.  My little ones wanted the Frankenstein bags, but I had leftover orange felt from the Candy Corny Halloween Banner, so the pumpkin bags won out.  


I also thought I should share a picture of Henry sporting his new Quick Change Trousers I made with Sarah Jane's Children at Play. 


I love them.  I love the pattern.  Most of all I love my chubby little model.


And, look at Henry's smile.  I think he loves the pants too.

That's all from the West Coast.  Hopefully I'll have more to share soon!

Tuesday, October 18, 2011

Nothing too big

I wrote an email to Annee last week letting her know that I think I might be retiring from sewing.  I was of course being all dramatic and feeling sorry for myself because I find myself drained of any energy at the end of my days. My nights used to be my creative time and I would work for hours after my kids went to bed sewing and making things.  Now all I really want to do is just sit and watch TV or look at what everyone else is making in the crafting blog world.  Annee reassured me that I'll find my "balance again soon," and I know she's right.  It might not be too soon, and that's okay too.  I do have high hopes of sewing things for Christmas, and I keep thinking if I start soon enough then maybe I can make it happen.  However, I haven't moved past the thinking about it stages.  Looks like I need to start taking action before October turns into December!


Okay, but on to what I have made.  I know I can buy birthday gifts at the store, but isn't it more fun to give something more meaningful?  I think it is, so I've made a couple of birthday gifts recently.


But the main thing I've been working on, and it's such a small project but took me so long (reread the first paragraph of this post), is a new pillow.  I love pillows, and I'm feeling like my pillows need a change.  I bookmarked this free pattern years ago, and recently rediscovered it.  I also bought some fat quarters of Anna Maria Horner's new fabric line, Loulouthi.


I took AMH Hugs and Kisses in Ocean and combined it with Summer Totem in Tart and made my own Hourglass Pillow.  


Notice my little helpers foot in the background?


The only problem I ran into, and you might not notice it if I didn't mention it, was I didn't have enough of the Summer Totem.  The pattern is so big, that I should probably used a 1/2 yd cut when I made this pillow.  On one side of the pillow the flowers are right side up while the triangle opposite of the right side up flowers has upside down flowers.  Does that make sense?  


It's probably too confusing and it's late so my brain is starting to shut down, so study the pictures if you want to see my mistake.  Otherwise, just look at how beautiful the fabrics are that Anna Maria designs.  I'm really thinking I need to make these curtains with some of her fabric.  The only problem - which two fabrics do I chose?!


I also used AMH fabric on the back.  The red is from the Garden Party line, and the harvest yellow is from Innocent Crush. 


This was my first pillow I added an invisible zipper to.  Totally easy, and I will for sure be doing that again.  I used this tutorial as my guide, but you can also just read the instructions on the invisible zipper package.  Such a cinch.  The funny thing is that the zipper was mentally stumping me, and I just thought it was going to be so much harder than it was.  


Like I said, nothing too big, but at least it's something!  

Sunday, October 16, 2011

The $7.50 Dress

Maybe you've seen THIS little number from Shabby Apple?!

I tried to make something similar for $7.50:


There are two different tutorials out there if you want to follow one.  I found the one from "Craftiness is not Optional" to be a little more useful.  I liked her flower technique.  Here's that LINK.

Feel free to compare it to the tutorial from "Sewing in No Mans Land", HERE.

I was sad I didn't have enough fabric to make the skirt on my dress using the circle skirt technique, a la Dana...

I found my purple polka dot fabric on the remnant table at JoAnn's.  Ultimately I didn't feel like it was ever worth going back and spending $10 per yard more, when I had gotten this yard for less than $5!  

The only major difference between my dress and the two tutorials linked up there is that I decided to integrate my waist band into the construction of the bodice.  They both added it on-top of the dress, after they had attached the skirt.  I see that the advantage to that is that you don't have such a long bodice.  But I liked the clean construction of having all those layered sewn together in sequence.  I guess it doesn't really matter which way you'd make it.  

Once again I used the bodice and sleeve pieces from the Oliver & S Jump Rope dress pattern.  I sure have gotten a lot of use out of that pattern.  I think it goes to show, once you know the basics of dress making, with only a few simple pattern pieces, the sky is the limit!

Next up:

On my birthday I found myself at my local fabric shop.  I walked out with half-yard cuts of the following fabrics:

(isn't it cute how the lady folded them?!)


Now to decide what to make with it.  I think I used to know what I wanted to make.  Now I think I forgot.  I sure love staring at it...

Wednesday, October 12, 2011

I had a birthday.

My birthday was Saturday.

All week long, leading up to Saturday, my husband kept asking me what I wanted him to get me for my birthday.  I kept thinking, and thinking, and wondering why I couldn't think of a single significant thing.


Then, on Wednesday when I stepped out into the sewing garage, I realized it had become more "garage" than "sewing studio".  And the mess was driving all of my creativity away.  I was at a breaking point.  I admitted to him that the only thing I wanted for my birthday was a sewing room makeover.

I should be totally embarrassed to post these next pictures, but they will make his "gift" to me that much more dramatic...

Here is where I used to go to sew:


Our garage is detached from our house.  Since we live in a former model home, the garage was the design studio (please notice the design feature signs that were plastered all over the walls.  They've ben a constant source of inspiration, as you can imagine, NOT!).  It's completely finished, with hardwood floors and everything.  It's a dreamy space to have to sew in, but I do have to share the space with the normal stuff that a family of six puts in their garage:


I tried to split the space down the middle, having the sewing stuff on the left, and the garage on the right.


Before I show you what my husband gave me for my birthday, you should know that organizing and cleaning run deep in the marrow of his bones.  It's impressive.  And intimidating.

Happy Birthday to me:


He re-folded fabric.  Re-stacked piles.  Emptied old boxes of notions, and created bigger and better boxes.  


Added a hanging bar and hooks for all things scissors, brilliant!


Though it may be hard to believe, all of my thread had previously just been thrown inside of a tupperware box.  Seriously.  Darin put it all in rainbow order even.


A new "task board" to keep myself organized and on track. A tack board that will eventually house fabric inspiration, after I'm done looking at my homemade birthday cards.  As you can see, my kids have already given me a few "tasks" already!


And he even hung my favorite fabric streamers and felt hearts!  


Now the garage fits neatly behind the "wall" that he created out of the Ikea "Expedit" shelving system. 


He kicked me out of the space starting on Thursday (though we started "demolition" on Wednesday!).  I didn't get to step back in until Saturday morning.  I think he finally crawled into bed sometime around 3am on Saturday!  I have never loved a birthday gift so much in all my life!  He had a great time doing it.  He paid attention to every detail.  Even still, I'm not sure if he'll ever really understand how much this gift meant to me in that deepest, downest, inner most part of my soul.  I was, and still am, so overwhelmed and grateful.

Since I was kicked out for two days, I moved my sewing machine and accessories to my dining room table to keep myself occupied while I wasn't allowed to peek out the window!  In that time I was able to finish the quilt!!


And still had time to sew up a little "create" bunting to hang in my new Sewing Studio.


Finally found a good project to cut into my Denyse Schmidt "Hope Valley" fabrics, which have been sitting on the shelf since January 1, 2011.

Hopefully this is just the beginning of things I "create" that come out of my new and improved sewing space.  

It's like a breath of fresh air.

Thank you so much Darin!!

XOX

Sunday, October 9, 2011

Bitty Booties


Annee texted me this weekend and asked if I made Henry any baby shoes.  I then remembered that I did indeed make him some Bitty Booties a while back with matching Quick Change Trousers.  I also appliqued a onesie to go with the whole look some time ago.


I took some pictures a while back, but I didn't like my staging.  Just a little too much of the Heart Breaker fabric if you ask me.  Don't you agree??  Not to mention it was upside down.  Not my best picture taking!


So while I was texting Annee, I went and found the Bitty Booties and matching onesie, and did a quick photo shoot just as we were enjoying the very tail end of sunlight for the day.  The Bitty Booties fit perfectly and aren't tight.


And even though Henry didn't really care for them on his feet, he could kick them off.


As I was taking these pictures I started thinking about when I made the Bitty Booties.  Back when I had what felt like more time then I knew what to do with.  A totally different place then I'm in today.  But, besides thinking about all that has changed in the last several months, I thought back to the pattern and the process of sewing them.  These are from the Anna Maria Horner Handmade Beginnings book, and she sets up each chapter so that the first projects are the easiest to sew and the last are the most difficult.  In this book, Anna Maria puts the Bitty Booties before the Quick Change Trousers.  I'm not saying I'm an expert on anything, but having sewn both the Bitty Booties and the QCT I'd have to say the QCT are a wee bit easier than the Bitty Booties.    That my two cents and totally my personal opinion!


Both are equally as cute though, but  neither are as cute as my baby.  Sorry, but no comparison!

Here's to hoping I can sit down at my machine sometime soon.  I have a pillow that is sew waiting for me to finish it already!!

Wednesday, October 5, 2011

A little peak.

I've been working on a little something special for a tiny someone special!  This goes down as one of my favorite projects to date.  Love the fabric!  (Aneela Hoey's "Little Apples" for Moda.)  Love the design!  Love the size!  Love thinking about the tiny recipient!  So many things to love.

The Baby Pinwheel Quilt:


I used a single charm pack to make this quilt.  On the front, I used 32 charm squares.  I've paired each one with a 5 inch square of Kona White, 64 half-square-triangles later, this is what you come up with.  


I incorporated the last few squares from the charm pack on the backing.  More pictures to come by the end of the week.

 
The quilt top currently measures 40x40.  I probably used about 1 yard of the Kona white in addition to the charm pack.  The little black border was just something I had in the stash.  

I can't wait to get this quilted and bound and sent off!  But I am going to miss looking at these sweet prints.  I'll have to think of something else to make with these fabrics.  

P.S. While finding links for this post, I came across this little embroidery pattern from Aneela's Etsy shop.  I'm thinking I'm about to go make a quick purchase.  I'm dreaming of Halloween skirts!

Tuesday, October 4, 2011

Weekend sewing.

Though this is not the first time I've made this "Oh Fransson" wristlet, it was the first time my sister-in-law Amber come to visit me in NC.


Crafting together was vaguely on the agenda.  But not before, going out to eat, running, going to the movies, shopping, baking treats, and chatting into the wee hours.


When Sunday rolled around we realized our hours together were limited.  If we were going to sew, we'd better get serious about it.  Amber had noticed that I'd been carrying around my original wristlet all weekend long.  It is my most used sewing creation.


We pulled out fabric, started cutting, and eventually started sewing.


And kept sewing into the wee hours of the morning, until we had four wristlets between the two of us.


Making wristlets is fun.  But sewing with a friend is even funner.  


Is that a word?


Thanks for coming Amber.  Enjoy your wristlets.  
Related Posts Plugin for WordPress, Blogger...