Showing posts sorted by relevance for query bow dress. Sort by date Show all posts

Monday, April 9, 2012

Easter Attire and a Big Bow Dress How-To


Last week when I got the text from Annee about her inspiration bow dress, and after I pinned the inspiration dress to my Make for Grace board, I knew I needed to make one.  Part of the excitement of sewing is figuring things out.  I wanted to not only figure out how to make the bow dress, but I also wanted to full line it.  I can't remember why the lining because such an important aspect of the dress for me, but it was.  And made a sample dress on Wednesday night, and I figured out the bow and the lining.  I was so excited about the prospects of a cute Easter Bow Dress, and then I got a vision of my boys wearing seersucker pants along side her.  I held on to the vision, and away I went Thursday to my JoAnn's for some fabric.

Then it was a matter of just getting things sewn.  Last night around 10 p.m. I put the finishing touches on my boys trousers.  I'm not going to lie.  I was totally giddy last night.  When I finished Grace's dress on Friday night, I was really nervous that I wasn't in love with it being all yellow.  However, after I finished my boys outfits last night, I was so excited.  I had a vision of what I thought it would all look like together, and in the end I really feel like I created the look I was going for.


Henry sported a little yellow on his back yoke to match his sister.


George was thrilled with new pants.  I was really nervous about the fabric being bothersome (note: JoAnn's seersucker is expensive for the crumby quality of fabric), but George didn't even notice.  It probably also helped that I used the same pattern for his pants that I used for pajama pants, so the cut is very comfy.  


Grace's dress, in my opinion, stole the show.  But, if you ask Grace she wasn't happy with it.  It wasn't fancy enough for her, and she claimed it wasn't modest.  Quote, "Mama, I just really don't feel modest in this dress."  I've ruined her by making her wear leggings to school every day.  I think she wanted leggings, but I took care of the tears with the promise of some Easter candy.

Do you want to make your own Big Bow Easter dress??  Easy peasy.  Start by purchasing this pattern, Simplicity 4927.  It's the best $3 pattern you could buy.  It's a basic A-line pattern, and the options are endless for what you could turn it into.  The pattern runs 1 to 1 1/2 sizes large.  Grace wears a size 5, but I used the size 3 pattern pieces for her dress.  I added 2 inches to the length, and I also took an inch off the armholes.  In the picture below I cut off the brown line making my armholes bigger and the neckline not so boxy.


Next when I cut the front dress piece, I placed it two inches away from the edge of the fold.  This added 4 inches to the width of my dress.  Now Annee only placed her pattern piece one inch away from the edge.   My box pleat is a little big, so this is all a matter of personal preference.

**I forgot to take a picture of this with my yellow fabric, so I had to do a special photo shoot just to show you what I did.  Don't let the orange fabric fool you!**


Now in the inspiration photo, the dress has two pleats in the front.  Annee in her blue bow dress just did one pleat, and I agreed with her that it looks just as cute, and therefore, I did only one pleat.  To make my pleat, I place a pin at the top edge of the neckline where I added the extra fabric.


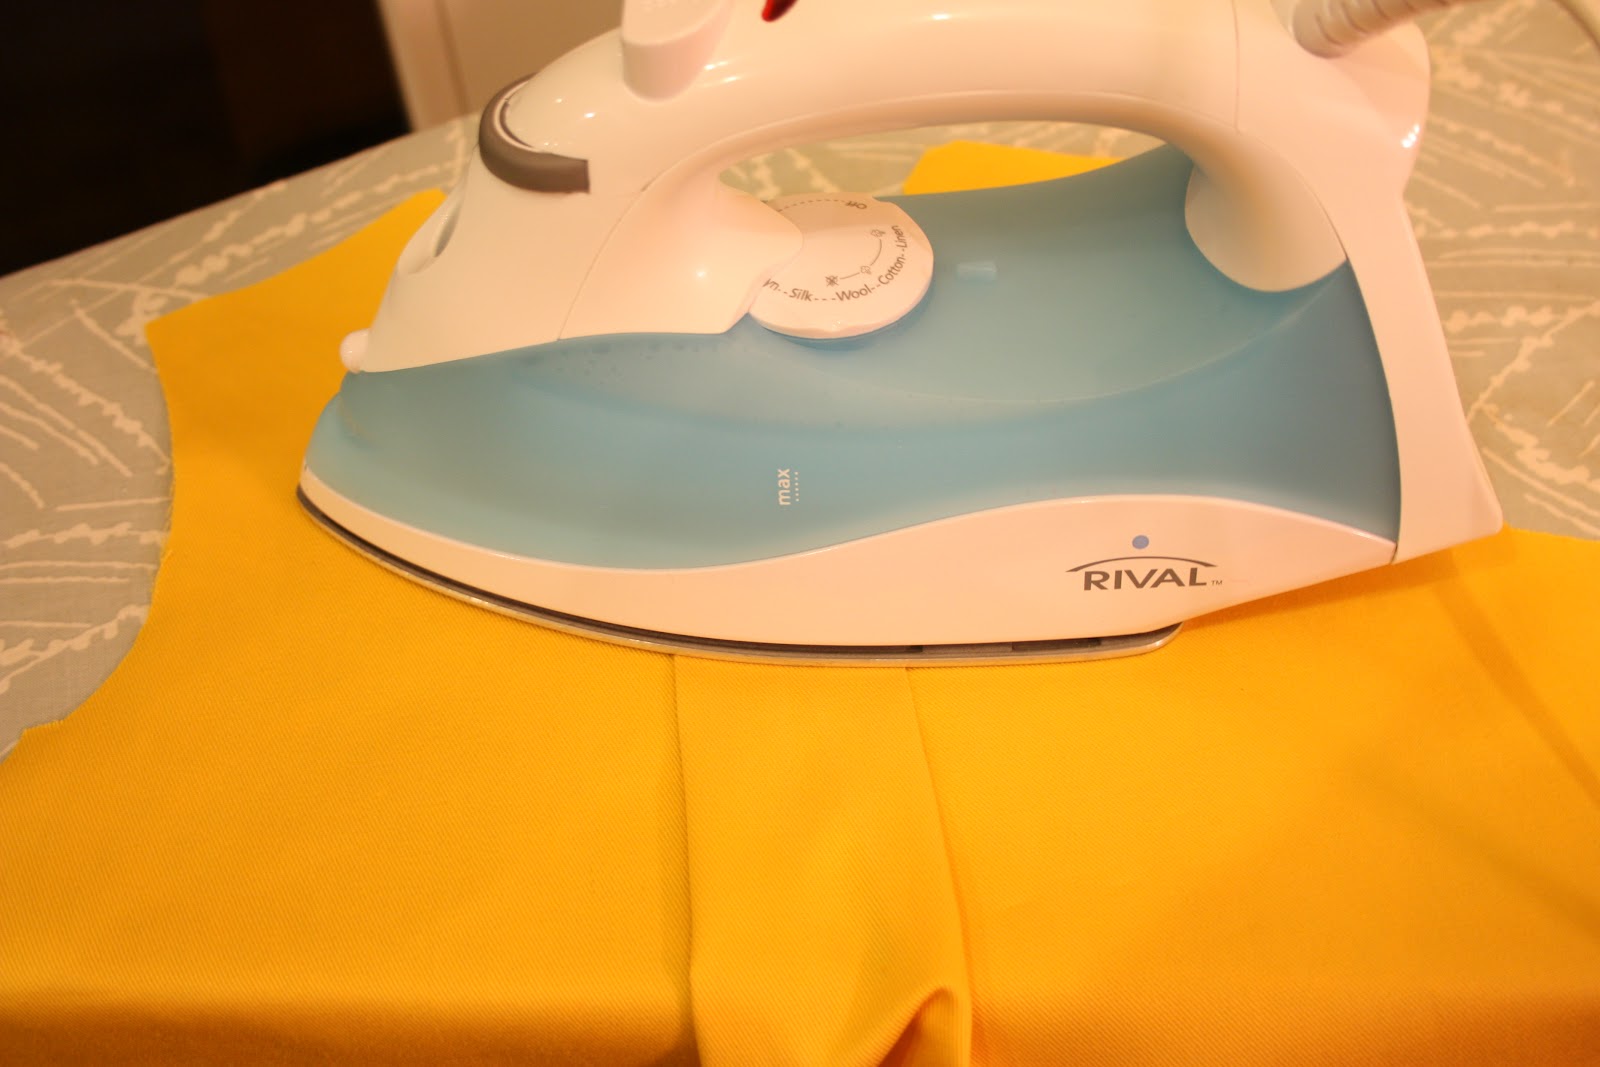
Then I opened up the pleat and ironed it flat.


Then I opened up the pleat.


On the outer most creases, I made a buttonhole large enough for a 3/4 inch button.  The bottom of the buttonhole is 2 1/2 inches from the top of the neckline.

Sorry, the buttonhole picture is blurry!


Then I folded my box pleat back up, and did a basting stitch to keep it in place.


I then finished my dress.  Now I did figure out the lining, but that is a how-to for another day.  After basting the box pleat you would just follow the rest of the instructions that come with the pattern.

To make the bow, you need two rectangles, 10 inches by 6 inches.  Sew them right sides together leaving an opening on one side for flipping.  Turn right sides out, and topstitch around the bow.  Sorry, no pictures of this step.  Then as your final step to the dress, carefully slide your bow through your buttonholes.  And, then you have your own Big Bow Dress!!


I recognize this isn't the greatest how-to.  If you need more help or have any questions, please leave me a comment.


For a girl who was really disappointed with this dress, Grace really knew how to hide it.  


I added a zipper to the back of my dress.  This was the first zipper I put in a dress.  Well, second if you count my sample dress.  I'm sure it's not technically correct, but I think it works and looks fine.


And that's an Easter attire wrap!  Whew.  It was just a little bit exhausting getting everything together, but in the end any lost sleep was worth it.  I think!?!


Stay tuned.  It's my week to post here on Made on Maple.  I've got lots of fun things to share.  Get sew excited!

Sunday, June 17, 2012

Ice Cream Dress


Summer time has freed me from driving around and dropping my kids off at school and activities, but for some reason I feel busier.  It might be that my baby who is not so much a baby any more is in constant motion.  He's a walking hazard.  Sure he takes naps, but then the big Gs need me and my attention, and well, there's not so much sewing go on these days.  I'm not complaining.  As I look at my little ones practically growing before my eyes, I'm just trying to embrace the busyness.  


However, a week ago I got the urge along with a serge of energy to sew a dress for Grace.  I've now sewn this pattern three times (practice does make perfect), so the dress came together in under 3 hours from cutting to finished stitch.  I used the pattern I used for the Bow Dress.


I used Liesl Gibson's Lisette fabric found at JoAnn's.  I walk past her display all the time at JoAnn's and I've eyed this fabric several times wondering if I liked it or not.  I do.  It's cute, and I think it's perfect for my growing little girl.


I also found a dress in the Mini Boden catalogue that used the extra large rick rack, and I knew I needed to incorporate it into a dress for Grace.


I fully lined the dress.  I've decided this is my favorite way to finish this sleeveless A-line number.  I don't enjoy making bias tape work around the arm holes.  One day when I make another one, I'll show you how I line it.  I'm also getting pretty darn good at zippers.


Of course when you wear an ice cream dress you have to eat ice cream!!  Grace will tell you this was the best photo shoot ever.  George would agree because he too got an ice cream.


 Here's to more summer freedom and more ice cream cones!

Wednesday, April 4, 2012

I got motivated.

Last Sunday it occurred to me that Easter was only one week away, and I didn't even have a plan yet!  I knew I wanted to make new dresses for my girls.  Last year's dresses are still favorites.   But I hadn't thought about fabric or patterns, etc. for this year.

Enter Pinterest for inspiration!  

This dress was pinned on my board:


Without a pattern or a tutorial, I was really going to need to use my brain!  Liz suggested I could start with the same pattern she started with when she made a simple A-line shaped dress.  It's Simplicity 4927.  

My good friend Summer had these dresses pinned on her inspiration board, also stemming from the same basic A-line shape (and had successfully copied the middle version.  So I had her help with my second dress):


So those were my inspirations for the two dresses I attempted first:


Both started with Simplicity 4927.  Both ended up with slight variations and hopefully improvements with each go round.  And neither one of these dresses are for Easter!  But they will most definitely get worn over and over again this spring and summer.


This navy blue is so hard to photograph!  Sorry.  For the bow dress you need to add an inch, ON THE FOLD, to the front dress piece.  That way you have enough extra fabric to fashion a box pleat.  Then, behind that pleat I inserted button holes on either side, so that my bow could slide through.  I used a cotton stretch poplin and Ruby has already worn it to school and bike riding, play ground playing, etc.  It passes the comfy test!  


This green one is made out of linen from my Korea stash.  Since I was worried about itchiness, I had to do the lining differently, thus altering quite a bit the way I constructed it.  But still, it's pretty simple.  They both close in the back with a loop and button closure.  

Neither is perfect!  I know that.  They are workable prototypes.  I hope I'll just keep getting better and better with each subsequent dress.  Because the UPS man just dropped off the Easter seersucker.  Do I have two more dresses in me before Easter?!  

I better go take a nap first :)

Wednesday, October 27, 2010

Need something to make...

Here's an idea:


I first saw this bag HERE (scroll down to the last picture).  (Now that I look at it again, I see I did make mine different with the little box pleat things at the bottom of the bag.  Making it flat would have saved me a bit of time, but I really liked the shape in the end.) The minute I saw it, I said to myself, "Self, you should make one of those bags.  You'll love it".  It's taken me until a few days ago to act on that impluse.  I bought the fabric from Ikea what feels like weeks ago.  It might in fact only have been two weeks ago.  I was not charmed by the quality or texture of the fabric when I first started working with it.  Ask Liz, I called her and made fun of how lame the fabric felt.  But after ironing it a bit (which I was afraid to do at first, not knowing what the stuff was made out of), it kind of softened up and started feeling less synthetic and plasticky.

It's a super simple bag.  I really should have been more thoughtful and taken pictures of the process.  I made the bow in the exact same manner as the green pillow I made what feels like yesterday ago. I think I'd like to make a promise, right here:  The next time I make something with this bow on it, I'll turn it into a tutorial.  

That was a big promise.  But I'm going to do it, only because the two things I've now made with this bow on it, have made my life happier.  I believe everyone's life should be happier.  So, when the fancy next strikes for more bow adorned items, get ready for my first ever tutorial!

The bag is now in the mail on it's way to make someone else happy.  But, I'll totally admit that before I mailed it, I sampled it one time, with the cutest teal colored dress that I wore last Sunday!   It was a colorful combo which made Sunday more of a joy!

In summary, the bow bag made my life happier, in so many ways.  Thank you.

(And, it only took two hours to make, because that's how much more of my book I was able to listen to before I was done making the bag.) 

 
But now, it's turning fall here in the South.  We need more long-sleeved dresses.  Andrea's Go-to-dress, certainly seems to be living up to it's name.  I keep "going to it".  Thanks Andrea.  This time I did lengthen it by exactly 4 inches.  I really like the length.  This way tights are optional if you have an unusually warm day in nearly November.  And, we'll probably get to keep wearing it next year too, with the added length.  So that's totally a bonus.  


So that's it.  That's my contribution to MOM from the East Coast.  But really, sewing inspiration, book recommendation, and a hot tip on a new dress for Sunday, all in one post?!...I think I've gone above and beyond, if I do say so myself.

XOX  Annee

Tuesday, May 25, 2010

Popover dress take two.

I loved this fabric combo so much, that I had to do a few more things with it, before I could let it rest...


Also, I had an idea with the Oliver & S Popover Dress that would involve a ruffle, but less ruffling than the whole hem of the dress.  Let me try to show it to you a little better:


In my opinion it is just the touch of "something" that was needed.  I contemplated whether the ruffle should have been in the contrast fabric as well.  And it could have been, probably.  But, I like a bit more subtly in my details, for now.  The other two changes/additions I made were; I finished the little strapes.  The little bows tied shut are cute, but I think it looks really nice finished as well.  Plus, it takes less fabric cut on the bias.  Rather than cutting the strap piece twice as long as it prints out, you get to cut it the length of the printed piece. 

Finally, rather than a ruffle trim on the hem, I just did a contrast band.  I added the band before I sewed the front and back pieces together.  You could do it after as well, but I liked doing it one piece at a time. 

Of course, the tiered skirt was a necessity: 


I took the measurements from an existing skirt that we have and love. 

Finally the onsie dress that I've been trying to figure out since before Liz was here!

I know, it doesn't seem like such a big deal, but this project wasn't simple.  The thing is, I wanted the little snap bottom piece to still be attatched:


It really seemed so clever to me to have a dress for your three month old that wouldn't find itself up around her arm pits as they are scrunched up in your arms.  Trust me on that one if you've never had a three month old little girl in a dress. 

But attaching that ruffled skirt piece to the intact onsie was way more tricky that I wish it was.  It became necessary to either pick it all apart because of little pintucks that occurred, or to add the little belt band.  The belt band was actually easier than ripping it apart!  Maybe there should be more to it.  Maybe the shirt should have something on it, or a bow or a flower.  But sometimes, enough is enough.  I'm calling this dress done.  It gets bonus points for being so cleverly attached to the snap bottom! 

Okay, now I only have six days left!  Let's see what else I can finish before we leave...

Monday, August 30, 2010

Just wondering...

If the enchilada sauce came out of the bow shirt.  I was so sad to hear the new creation got stained, but I totally understood.


Moments after I took the above picture of Grace in the A-line dress she got dry erase marker on it.  Black dry erase marker to be more specific.  I immediate went to work on it trying to get the stain out.  I got it to fade, but dry erase is synonymous with permanent.  Oh well.  I mean I did make the dress for a four year old, so what did I expect!?!  I think I expected at least one wear out of the dress before it got stained.

But I'll get over it.

As for the back of the A-line dress, here's a pic for you!


The pattern called for elastic cording and a button to close.  I used the patterns placement for the button and cording, but it was all wrong.  Next time I'll just place it closer to the neckline.  I also had to use bias tape for the cording because I only had black elastic cording, and that just wasn't going to match!

This weekend I started it of by making the most delicious whole wheat pizza.  The Italian is bit of a health nut, so I've been searching for a good whole wheat pizza dough that tastes as good as white dough.  I think I've found it.


I'll post the recipe another night.  I have to wake up early tomorrow. Sorry!

Next I made another bow pillow.  Remember when I made this one?  I've been wanting to make one for myself since I saw the cute one I made for my mom at her house.  I thought it would be the first thing I made when I got home from my vacation in the South.  Guess that didn't work out the way I thought it would!


Maybe a bit too much to have the brown animal print next to the black and white one??

I'm almost done with making pillow for my couch.  I have a rectangular pillow form that I want to make a cover for, but I just haven't been hit with the inspiration of what to do to it.  Stay tuned!

I didn't make this next item, but I'm so excited it arrived in my mailbox on Friday.  It's another B to add to my B wall.  I found it here.  I love my new B, and if you want a letter or two for yourself just know that shipping is free!


Lastly I whipped up a quick banner tonight for a friend.  Just a little *celebrate* love being spread from the west coast MOM headquarters.


And that's all!  I'm off to bed right at midnight.  That's early, right??

Thursday, June 14, 2012

It's only taken me since Easter...


At Easter I had the idea of making two seersucker bow dresses for my ladies.  Unfortunately, after making a navy blue prototype, and then one green seersucker final draft dress, I was out of time.  The second/third one never got made.  As the weeks passed after Easter, I never felt excited about making a third dress that was exactly the same.  I get burned out easily from making the same thing over and over again.  It's why my girls aren't often matching.


But I still had enough yardage of a red seersucker to make another dress.  I've just been waiting to think of what style dress I wanted to make.  I decided to incorporate a bow somehow, so that when the sisters wear them side-by-side they will still look like a set.  Here's what I came up with:


Maybe you recognize the pattern?  


I had to enlarge the pattern, since I had actually cut out the pattern pieces from the original pattern.  The original pattern is  Simplicity pattern #2825.  

I am so happy to have finally finished my Easter project!!  I am slowly but surely getting things checked off the list.  Feels good.  
Related Posts Plugin for WordPress, Blogger...